Tuesday, December 29, 2009
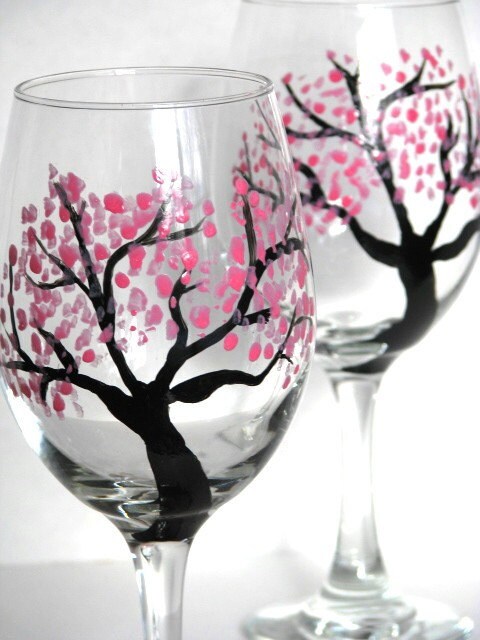
Avatar Inspiration for Painted Design
I love it though- I think they are pretty and there’s actually a lot of symbolism behind cherry blossoms. The Chinese see the cherry blossom as a symbol of power and beauty while the Japanese view a fallen cherry blossom as the beauty of snow and it also has represented a warrior whose life was ended early in battle. Learn something new every day!
Monday, December 21, 2009
Be the change you want to see in the world
I was recently challenged on my decision to support a cause that impacts another country when I could support a charity that impacts Americans. Well, my reason for doing so is because every person in the U.S. has access to clean water...you can walk into almost any public place and use their drinking fountain for free. That is not the case in other places in the world and I personally feel that all people should have access to this basic resource. Here are a few interesting facts on the size of this problem:
- 1 out of every 4 deaths under the age of 5 worldwide is due to a water-related disease
- Nearly 80% of illnesses in developing countries are linked to poor water and sanitation conditions
- A small amount goes a long way...$10 provides 1 person with clean water for 10 years!
Those are just a few of the reasons why I feel this is a cause worth supporting. If you're interested in learning more about this specific charity, visit http://thewaterproject.org/
Wednesday, December 16, 2009
What to do with the dress after the wedding
Sunday, December 13, 2009
My Christmas Gift has Arrived...
Tuesday, December 8, 2009
My first custom order!!
Now that I’ve started this hobby, I’ve started to habitually check my Etsy account for any sales, client feedback & hit rates. Over the weekend, someone “hearted” my shop, which I was clearly ecstatic about. I get excited over the smallest things, but it helps keep me motivated!
If you’ve never gone on Etsy, I highly recommend checking it out. It’s a site for artists to sell their handmade items and you will find anything and everything on this site. I’m slightly addicted to it because there are so many stylish items that you wouldn’t be able to find at a store and I love having unique things. And of course, check out my shop while you’re there: http://www.prettymydrink.etsy.com/ . Happy shopping!
Tuesday, December 1, 2009
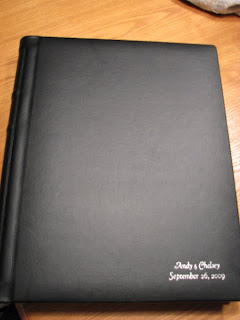
The Wedding Album has arrived!!
The inside pages are very thick:
I used the company's already existing templates and found them very easy to use. If you are ordering product and live outside of Maryland (their location), you pay no taxes on your purchase which is an added bonus! Here are a few pictures of the inside pages:
Sunday, November 29, 2009
My very first art show
And I plan on giving these to my newly wed friends....the are so darn cute:
Friday, November 20, 2009
How to Change Your Name
1) Order a few certified copies of your marriage certificate (I ordered 20 and that was waaay too many...most of the places just asked to see a copy and returned it)
2) Get your updated license first. Bring a copy of your marriage certificate and if your address is changing, you'll need an actual bill with your name on it and your new address before they can make the address change to your license. Something to keep in mind- if your license happens to expire within a year, make sure to have them renew your license at the time you are getting it updated with your new name (which means you need to take the eye exam). If you don't, you'll just end up paying an additional $30 to get your license renewed in a year.
3) Take your new updated license, marriage certificate and utility bill (if your address is changing) to the social security office to get your new card (they mail it to you within 2 weeks).
4) Then on to update everything else: checks, credit cards, mortgage, insurance, employer 401K, emails, etc.
Credit card was easy- I just called them and they sent a new one...they didn't ask for any verification, but I'm sure it's different for each company.
If you want to change your middle name to your maiden name (which I originally wanted to do), call the BMV & SS office first to find out about the steps that you need to take. I tried to change it when I got my license, but I was informed (by what looked like a summer intern) that I needed to have this change reflected on my marriage license first. HOWEVER, my co-worker got it done at the BMV with no problems, so it seems the "rules" vary depending on the person you speak with. Good luck!
Wednesday, November 18, 2009
Brides with a Budget
Cake- Consider a fake one. Fake cakes look real (no one will ever know!) because real icing is used on Styrofoam tiers rather than real cake tiers. You could always mix a real cake tier for the cake cutting portion of the reception with fake ones- this is what we did…here’s a pic of the cake:
Photographer: consider hiring a student photographer or someone looking to build their portfolio- their prices are going to be a fraction of a professional’s prices. Or, you could opt to make the photo album yourself instead of having the photographer make you one. Depending on the quality of album you go with, you could save hundreds making it yourself! And yes, there are sites online where you can make your own flush mount album (the highest quality album out there).
Flowers: Re-use the bridesmaids bouquets as reception centerpieces. Just have a vase ready at the venue for the flowers to go in. Or, you could put all the bouquets in vases for the head table décor.
Veil: if you plan on wearing a veil for the ceremony, consider buying one online. There are many places online that sell beautiful beaded veils for a fraction of the price that bridal stores are selling them at.
Anything paper: if you like to DIY, save money by making all things with paper yourself (i.e., invitations, programs, escort cards, etc.). If you don’t know where to start, order samples of invitations online…then take them apart to figure out how to make them yourself, using the sample as your template.
Shuttle service: Instead of hiring a shuttle service to transport your guests from the reception to the hotel, have taxis available. This will provide your guests with a safe way to get home without having to pay the additional cost yourself.
Tuesday, November 17, 2009
DIY Wedding Programs
Creating Inner Pages: Withn the text boxes, type your program content (i.e., ordering of events, names of bridal party, special acknowledgments, etc.) & make sure to print double sided.
Once printed, use a scrapbooking paper cutter to cut the paper down so each page measures 11" by 5.5". Then fold both sides so you end up with a 5.5" by 5.5" folded piece of paper. These will be the inside pages of the program.
To create the outside of the program, cut a blank piece of paper down to 11" by 5.5" and fold. Using Word, create a 3" by 3" text box and fill in the box with the information you'd like showcased on the front of your program. I included the following: The marriage ceremony uniting (bride) to (groom).....Date, church, church address. You can copy and past this box several times on one piece of paper so when you print, you have several per page.
To help highlight the program information on the front page, cut a 3.5" by 3.5" paper square using a contrasting piece of colored paper. In my program, I used cream for the main pages and maroon as the contrasting color. Use glue, double sided permanent tape or glue dotes to secure the small squares together and then secure that onto the front cover.
To hold all the pages together, use a small hole punch - I used a size smaller than the traditional hole punch that I got at a craft store. While the program is folded, punch two holes where the fold is (1 towards the top of the program and 1 towards the bottom). Make sure to punch half way across the paper to create a semi-circle. When you open up the pages inside, you should have a full circle punch-out.
String the ribbon through the holes and tie with a bow. I personally found that the sheer ribbon looked more elegant :-)
DIY Pomander Balls
Supplies: 5" styrofoam balls, satin ribbon (or seam binding as a cheaper alternative), pins with pearl heads, flower craft puncher, cardstock, glue gun
First, wrap the ribbon around the ball and secure to the ball with glue. I found that it was harder to wrap the ribbon continuously because the ribbon would crinkle, so I ended up cutting the ribbon in strips (enough to cover one section from the top of the ball to the bottom). This method isn't as clean b/c of the ribbon ends, but this can easily be covered at the end with the paper flower punch-outs. Continue this step until the entire ball is covered in ribbon.
Next, using the flower puncher & cardstock, make about 150 flowers. There will be 2 flower punch-outs on one pin which explains the high number of flowers needed. Poke the pin through one flower and slide it down towards the pin head. Fold the petals forward and then poke the pin through the second flower and slide towards the pin head. Continue doing this until the ball is completely covered in flowers. Remember to leave a small open space at one of the ends for the loop and bow so it can be hung.
To make the loop and bow, first cut a piece of ribbon to the desired length and make a loop by glueing the two ends together. Securely pin the loop to the ball - you can also add some glue for more security. Cut another piece of ribbon and make a bow out of it- then glue this right next to the looop that you just secured.
Because I used regular ribbon, each ball cost ~ $8. This cost will be cheaper if you use seam binding.
Monday, November 16, 2009
DIY Wedding Invitations
I created the inserts in one word document using 4 text boxes. Each text box was 3.5" in width- once you create the text box, you can right click...select "format text box" and then type in the height & width you want. The heights obviously varied for each insert to ensure only the title was showing. These are the heights I used: Directions- 6.5", RSVP- 5.5", Accommodations- 4.5", Reception- 3.5". The RSVP insert was a post card that included a stamp and our return address on the back-side. The 5.5" by 3.5" measurement is an approved post-card size by the post office. We did not have any problems sending or receiving them and plus, they helped reduce the overal weight of the invitation.
For the invitation portion of the invite, I first cut a 5" by 7" piece of maroon cardstock and glued it directly to the pocketfold, over the ribbon. I then glued the actual invitation (6.5" by 4.5") onto the maroon cardstock. This helps create a more finished look. The invitation was made in Word, using a text box.
To seal the pocket fold shut, I made a square monogram in Word (1.3" by 1.75") that include the first letter of the Groom's last name and the wedding date. I glue this to maroon cardstock to mimic the look of the inside invitation and then using a glue dot, adheared it to the pocketfold so the two sides were shut. I wrote the names of the guests on the back of the invite (since it also serves as an inner envelope). Happy Crafting!
Sunday, November 15, 2009
My New Endeavor!
Now that our wedding has passed, I've been spending a lot of my time painting...on wine glasses! It's fun and a great way to add some style to the typical boring drinking glass....well at least I think plain glass is a little boring :-) Here is a set of martini glasses I worked on today: