Saturday, December 31, 2011

Ball of Treasures


I have tons of old jewelry, pins & beads that I wanted to display in a unique way rather than having them collect dust in my drawer. I like the look of decorative decor balls, so I decided to make one of my own to feature all of my treasures. I bought a 4" styrofoam ball from my local craft store, painted it brown and then glued all my little items onto it. I started with the largest pieces and then filled in the gaps mainly with beads & buttons. This took a while to finish, but the ending result is beautiful and the perfect way to display all of these neat treasures.


Friday, December 23, 2011

Bird Mobile Project for Nursery

In preparation for our first baby, I decided to take time off around the holidays to put the nursery together. The baby's room will get a new coat of paint which will include a handpainted mural along with other handmade items, so I thought I would post pictures on our progress. The first craft project that I decided to work on is a bird mobile that will hang above the crib. The idea along with the pattern for the fabric birds came from a knitting blog called Spool. Sewing has never been my forte and I feel like it took a while to just make one little bird. For those that are visual learners, here are pictures of each step in the process. 1) First, start with the bird body pieces cut from Spools' PDF pattern
2) Next, line up one side of the belly with one side of the body. When you start sewing those pieces together (starting with the un-patterned side out), you'll need to keep lining up the pieces together due to the curves of both pieces.

3) Once you complete sewing the belly side to the body, you can move on to the opposite side of the belly and start sewing and will continue sewing until the head is sewn shut

4) Next, you will turn the sewn bird inside-out and then fill it with stuffing. Once stuffed, sew the tail shut.
5) When you are finished with all the birds you'd like on the mobile, select 2 branches. I cheated and used decorative branches that were in one of my vases. You can find these at any craft store. What's nice about these is that they have a glossy coating to prevent any bark from being shed.


6) The hardest part for me was getting the birds to hang right-side up. I first glued the birds how I wanted them positioned on each branch with a glue gun.


7) Next, I used stretchy, clear string bought from the craft store and tied the ends of the top branch to a key ring that will be used to hang the mobile from the ceiling. You'll need a little patience to balance the bottom branch which was the most difficult, but once it's all set you'll have an adorable bird mobile that will be enjoyed for many years to come!

Monday, June 27, 2011

My L.A. Experience


I decided to take a trip across the country to visit a close friend of mine who recently moved to Santa Monica, a town located right outside of L.A. I was thrilled to find out the Tim Burton exhibit had opened at LACMA (Los Angeles County Museum of Art) and since I'm such a huge fan, I made sure to visit the exhibit. It was definitely one of the best exhibition's I've seen. There were more than 700 drawings, paintings, films, puppets and costumes that included the infamous Edward Sissorhands outfit (one of my favorite films). There was so much to look at, so many sketches and drawings from his childhood, of characters from some of his popular films like Beetlejuice, The Nightmare Before Christmas & Alice in Wonderland...just to name a few. Overall, I thought the exhibit was astounding, comical and a little wacky- a must see if you get the chance to view it!

During my visit, I also got the opportunity to attend a flea market.
This flea market was different from the ones I've gone to in Ohio- there were no dusty trinkets, musty smelling clothes or broken toys. Instead, I found tons of really cool vintage items that included gently used shoes & clothing, shabby chic furniture, one of a kind artwork and handmade jewelry- I was in heaven! And not to mention everything was so cheap! I ended up purchasing a hat, picture frame, necklace and 2 rings for only $50. This is definitely worth attending if you are ever in L.A.

Thursday, April 7, 2011

DIY Project: Stylish Chalkboard

My goal this year is to organize my craft room which is a tough task given all the craft stuff I've collected. I wanted a way to nicely display my "to-do list" on some type of stylish board that complimented the color scheme in the room. I really like the look of framed chalkboards and decided to make one on my own. The project was super easy and I couldn't be happier with the results! 
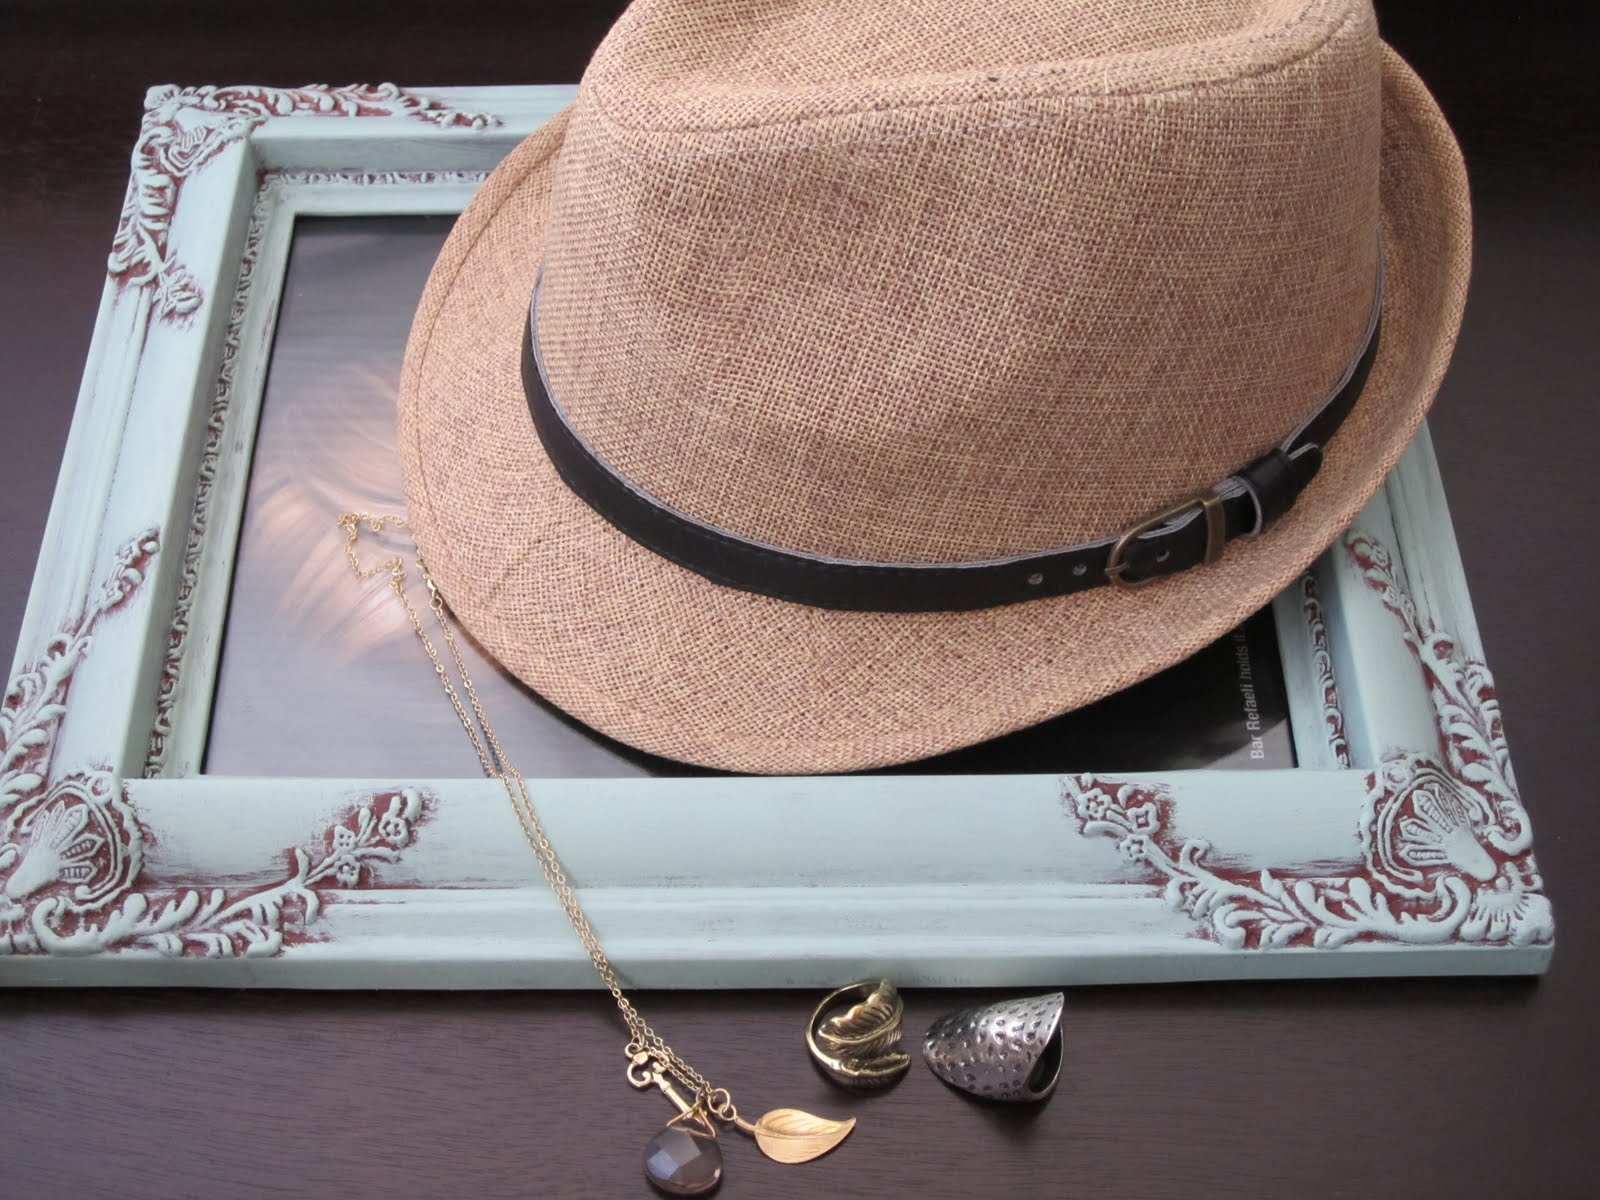
SUPPLIES: Picture frame, chalkboard paint, magnetic paint (paints can be bought at home depot) DIRECTIONS: Start by painting 3 coats of the magnetic paint on the glass portion of the picture frame. Wait 30 min. between coats before applying the next coat. After your third coat, wait 24 hours to dry and paint 3 coats of the chalkboard paint. I just love the resulting look- it's functional, yet stylish! Stay tuned for more pictures of my craft room as I try my best to get it organized :)

Thursday, March 24, 2011

What I Paint To

I thought I'd share the newest CD I bought...yes, that's right, I'm probably one of the few that still purchase CD's. Maybe I'm a bit old-school, but I enjoy reading the CD covers and looking through the pictures. The album is called "Lungs" by Florence + The Machine and their style has been described as being a combination of various genres, including rock and soul. It's not often I come across an album that I can play on repeat all day long which is basically what I've been doing lately while I paint :) They are definitely worth checking out!

Tuesday, February 22, 2011

Accessory Review


I wanted to share my latest Etsy purchase with you- the “Olivia Feather Headband” which is created by Kaang. I can’t get enough of headbands and have been searching for one with feathers that was eye-catching, but not too dramatic. I came aross Kaang’s shop and instantly fell in love- all of her headbands are stunning. I actually had difficulty making a selection and finally settled on one with fabulous peacock feathers. Every time I wear it, I get tons of compliments. It’s classy, unique & a little funky- just my type of accessory.